The following walk-through and review were not sponsored by any of the manufacturers mentioned. This review is based purely on my research and experiences, in the hopes that it might be interesting or helpful to you.
Like most off-the-shelf travel trailers, ours came with a tiny little bathroom exhaust fan. It was fine when we wanted to vent steam from the shower but that is about it. The original fan had a few big drawbacks: the air draw rate was poor for assisting with ventilation, the vent cap needed to be cranked open with a crank that was mounted flush with the ceiling, the vent cap allowed rain to enter when open, and the vent cap could be torn off in a strong wind.
The crank-height was a serious ergonomic issue that needed to be rectified soon after we moved into the trailer. I was able to make the crank handle more accessible by adding a couple sets of extensions to it.
But after spending most of the Arizona summer in our trailer, it was clear we needed something to increase the airflow.
We watched YouTube videos, researched different models, talked to other RVers, and finally narrowed our choices down to two good choices: a Maxxair Fan or a Fantastic Fan. We weighed the options available and went with the Maxxair 7500K fan with the translucent smoke-colored vent cover. Either of the fans would fit within the space of the existing fan, and the electrical circuit for the old fan was capable of running either.
I decided to get the Maxxair fan because it has a 900 cubic feet per minute draw, which would cycle the air in the entire trailer in under a minute. It also has 10 speed settings, a reversible fan, an automatic thermostat option, a remote control to eliminate crank extensions and switch wiring, and a vent cover that is rainproof even when open. And since our bathroom has a vent fan along with a sunroof over the shower, the light can get pretty overwhelming, so the darker cover was a nice bonus.
Unfortunately, I didn’t take a lot of pictures of the install process, but it was a fairly smooth process. The hardest part was removing the sealer from the old fan. The trailer was less than a year old, so the sealer was still fairly workable. Working slowly with a plastic scraper, I managed to remove almost all of the sealer and exposed the mounting screws for the old fan.
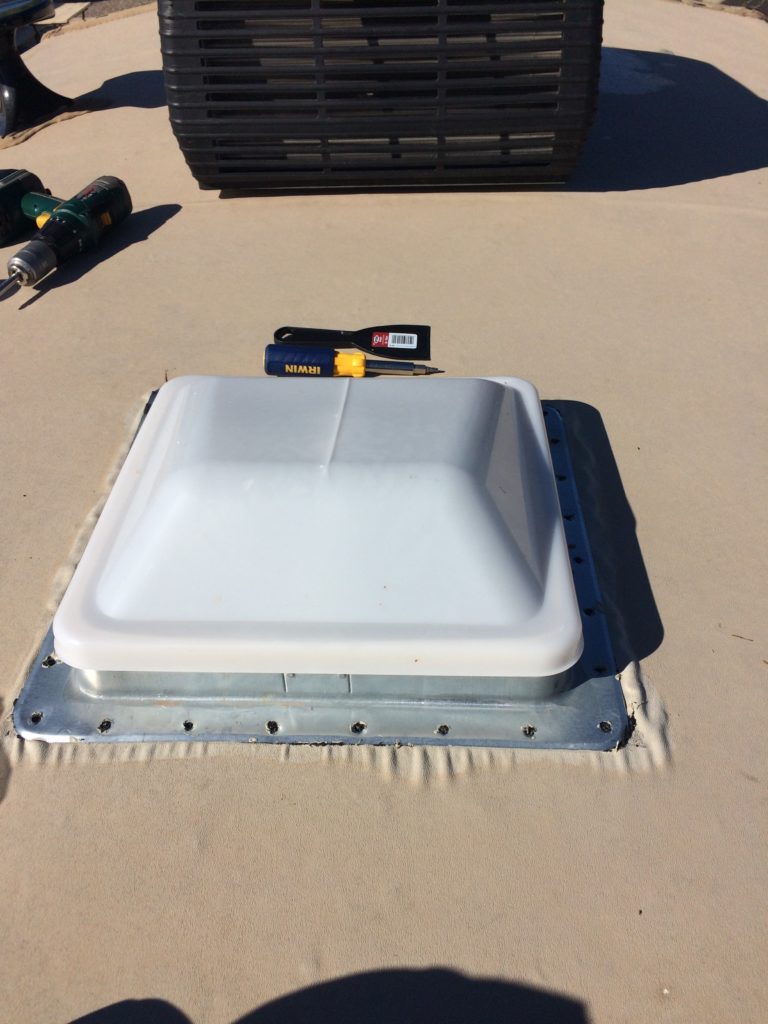
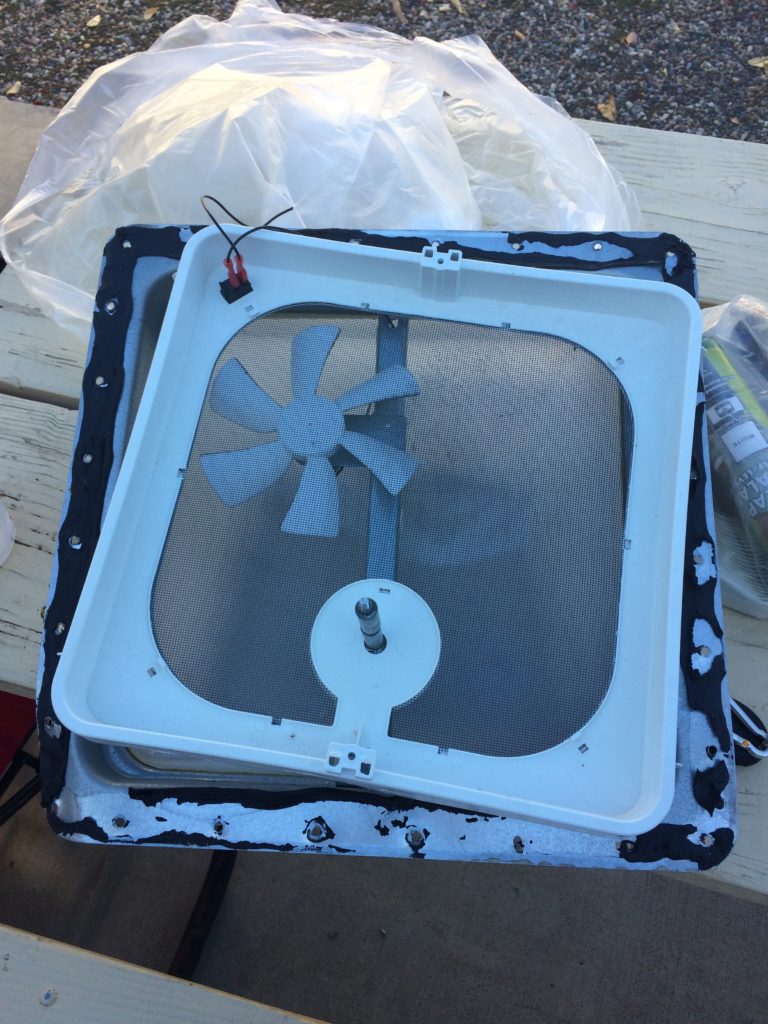
As you can see from the picture, the old fan housing came out without a lot of prying.
The Maxxair fan housing and cover are separate, and screw together after the fan housing is fully sealed in place. This made the install a bit easier.
I applied a couple strips of butyl tape to the bottom of the new fan housing and dropped it into the opening.
Before I screwed the fan into position, I connected the electrical circuit and tested the fan operation. Once I was sure the fan would operate correctly I screwed the housing to the roof, and used a whole tube of Dicor self-leveling sealer around the housing.
The cover fits over the housing and attaches with four screws from the side. This as an advantage, in case there are ever mechanical problems in the future. The inside trim ring is made to fit many different roof depths. Our roof didn’t require adjustment to the trim ring and it screwed into place cleanly.

It’s been several months since installing it, and its ease of installation and operation make it easy for me to recommend this model to any RVer who wants a vent fan that can operate automatically in any weather.
Our Maxxair fan is an excellent option to lessen the need to run the rooftop AC unit and gives us peace of mind when we are away from our trailer by allowing us to set the thermostat and keep the trailer cool for the cats while we are away. (Important note: During an Arizona summer, this is NOT ENOUGH for the safety of companion animals. Air Conditioning is imperative! But this fan works great during the winters, and the “in-between” of spring and summer.)
There has been talk of cutting in an additional Maxxair Fan above the kitchen sink area to further enhance our airflow. More on that later I am sure. I hope you found this helpful and please reach out if you have any follow up questions.

I have done the same thing with our earlier rig. It made quite a difference.
Another thing that I did with that rig and our present rig is change the shroud on the roof AC. I feel that the black shroud will absorb a lot of heat making the AC unit work harder. I changed to a white shroud on the unit. It just makes sense to me.
Thanks for your great articles.
Thank you, we still love our Maxxair fan. I have heard of people changing out the black AC shrouds for white, glad to hear it made a difference for you. Another RVer, while we were in Goodyear, AZ, had reflectex wrapped around their AC shrouds. Anything to keep the heat of the sun away would help. I have seen other RVers cut out he vent holes at the rear of the shroud and install screening that allows better air flow. I don’t expect to spend another summer in Phoenix but if we do I may have some more articles regarding beating the heat modifications.