RV water heaters are one of those appliances that we don’t think of until there is an issue. That little water heater works hard, especially when you are full-time RVers.


In order to prevent common problems, it is a good idea to drain, clean, and inspect the water heater system on a regular basis: at least twice a year. Water heaters with a steel tank require an anode rod to be installed to serve as a sacrificial material due to the naturally corrosive nature of water. Water heaters with aluminum tanks do not require an anode rod.
For steel tanks, the anode rod is normally installed as the lower drain plug, located in the bottom center of the unit, and it needs to be inspected on a regular basis. Anode rods should be replaced when the rod has degraded 75%. Once the anode rod has been used up, the water starts to corrode the walls of your hot water tank.
Before opening the hot water tank, make sure you turn off all heat sources to the tank, (propane and/or electric). IMPORTANT SAFETY STEP: You will need to either allow time for the water in the tank to cool OR turn on a faucet’s hot water to empty the tank BEFORE attempting to drain the tank.
Once the water in the tank has cooled, you’ll need to activate the bypass valve(s) for your hot water heater. This allows the tank to drain without affecting the rest of the water system. The hot water tank has a one-valve bypass system that incorporates check valves which allow the water to bypass the tank safely. Some systems incorporate three valves: one at the cold water inlet, one at the hot water outlet, and one to open the flow between the two lines.


With the water to the tank bypassed, pull the handle on the P & T (pressure and temperature) safety relief valve a couple times to allow any built-up pressure to escape. Using a properly sized wrench (in our case 1 1/16th inch socket), loosen the anode rod and remove it from the tank. Water and sediment will come out of the opening, and opening the P & T valve again will allow air to enter the tank and drain more quickly.
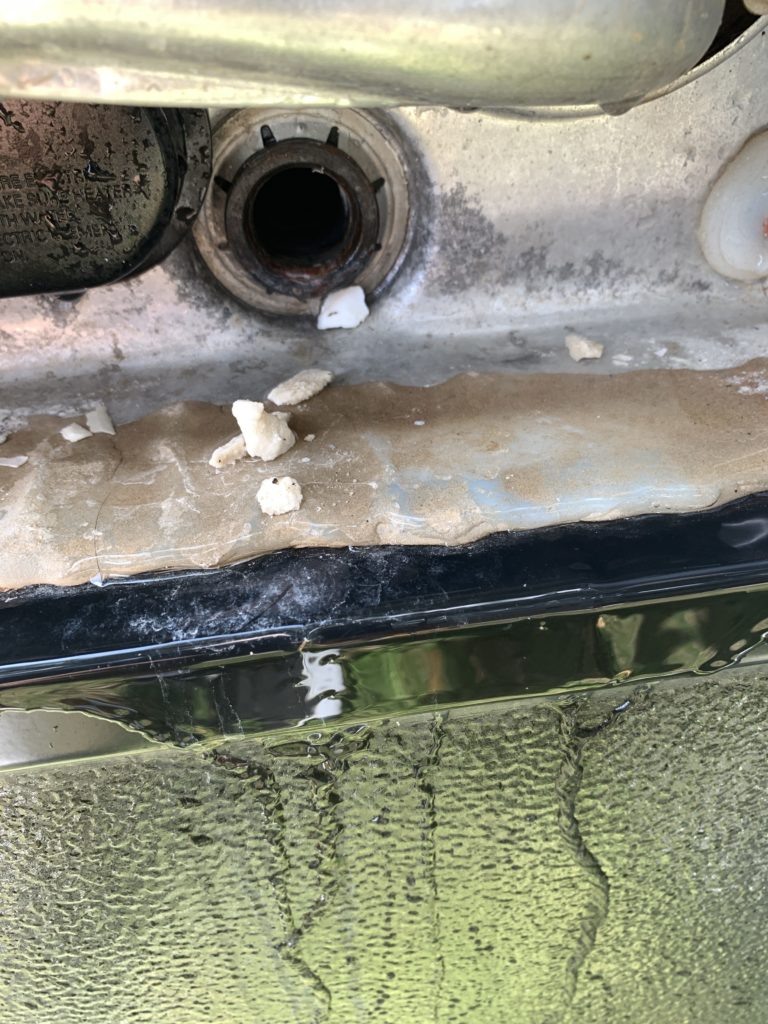
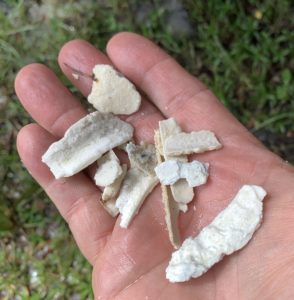
While the tank is draining lets take a look at the anode rod. Our rod had been completely eroded, probably due to being exposed to a year’s worth of full-time RV living in the Phoenix area, where the water is extremely hard. I expected to see significant anode rod wear and scale buildup in the tank, but this completely spent rod was quite a surprise!

When the tank has drained, you’ll need something like this tank cleaning wand to remove the buildup from the inside of the tank.
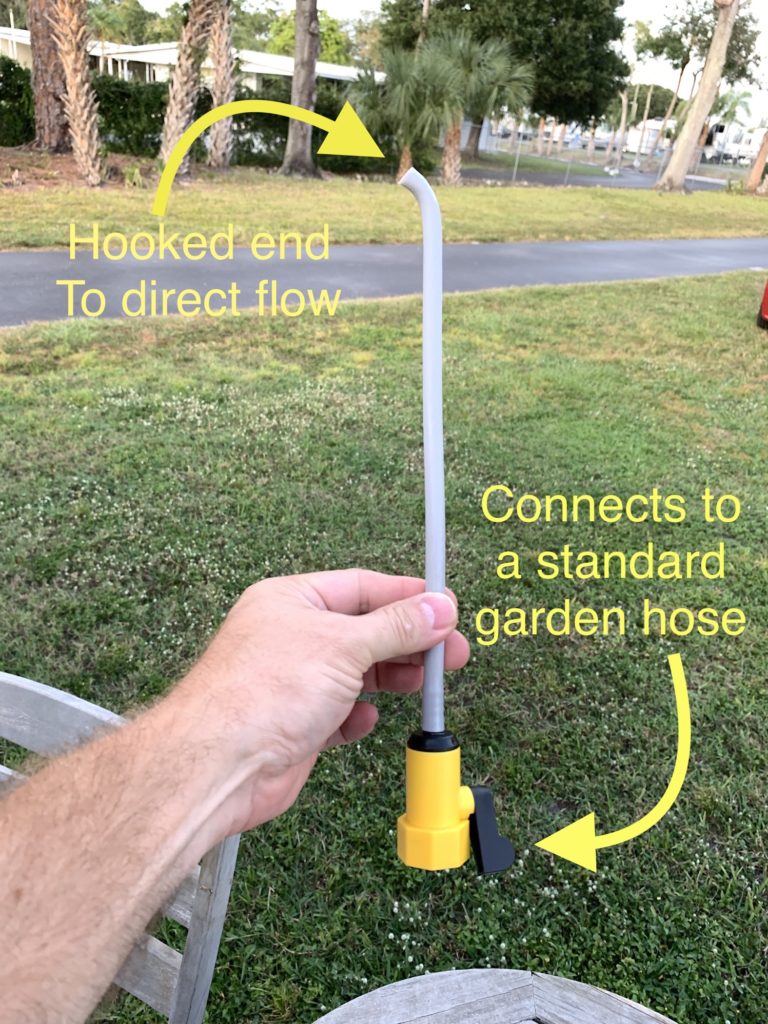
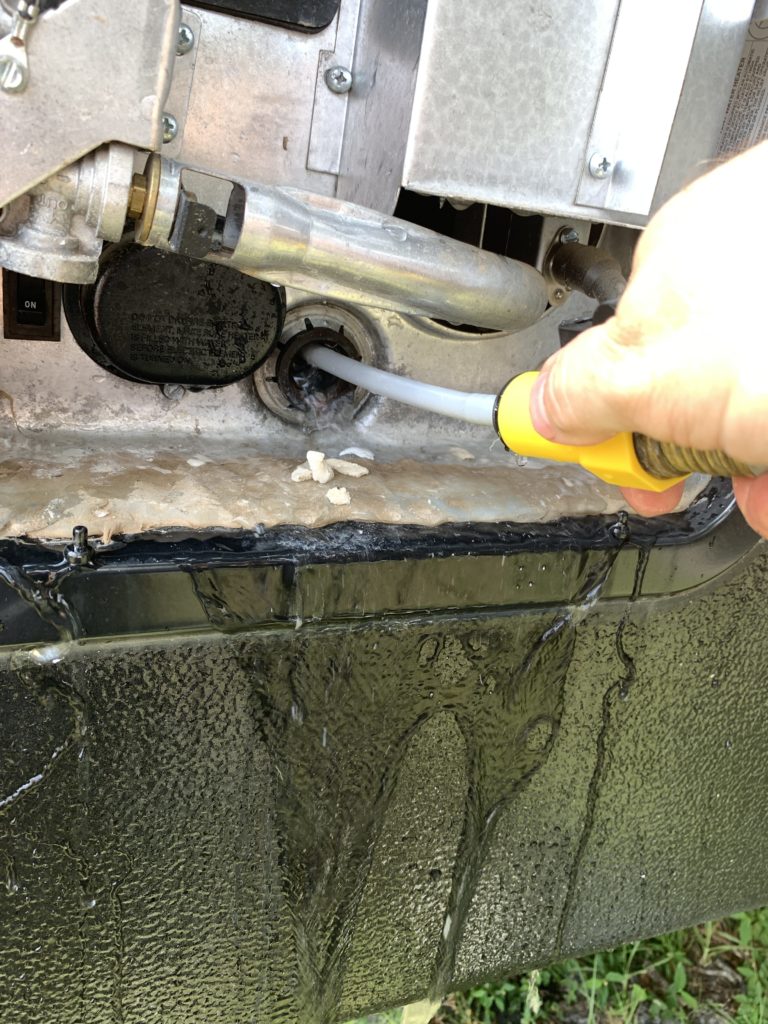
It may take some time to break up and remove all of the sediment material from the tank. Since the wand can fill the tank faster than the water can exit, stop the flow from time to time to allow the water to drain.
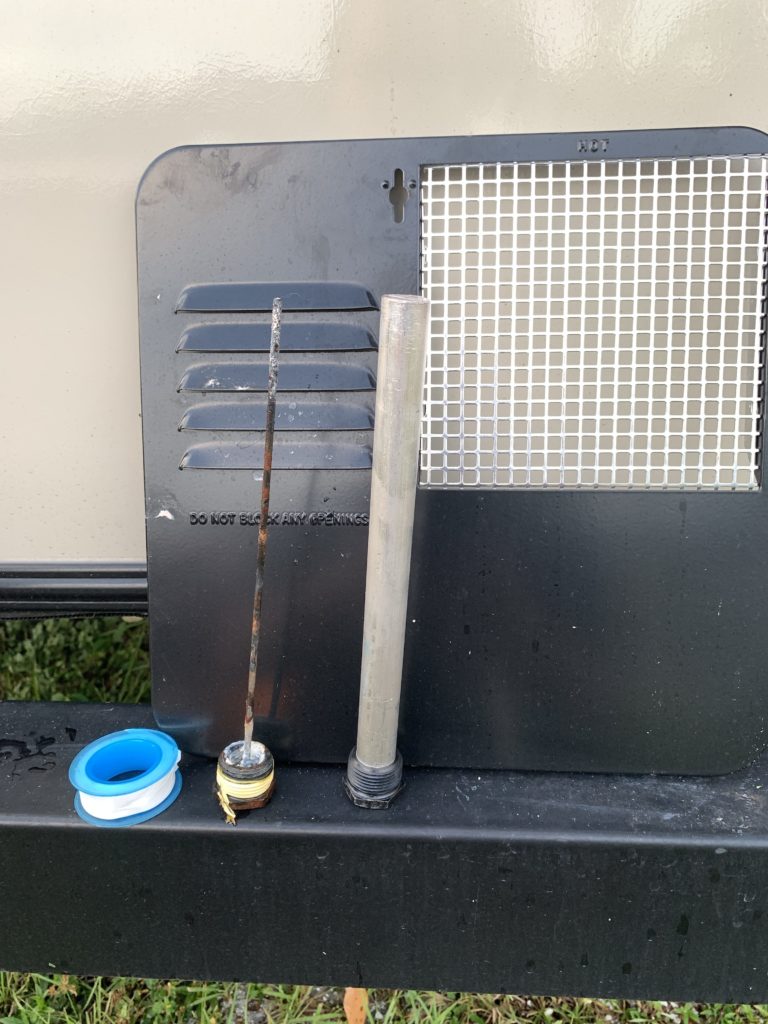
When you feel the tank is clean, it is time to reinstall the anode rod— in our case, we installed a brand new magnesium rod. It is important to clear any material from the threads and install a thread sealer, such as Teflon tape.
Once the rod is installed, reset the bypass valves to their normal position and the tank will begin to refill. You should open a hot water faucet inside the coach to allow the air in the tank to escape. Leave the faucet open until air stops escaping and water again flows smoothly. At this time, you can check the tank for leaks, but you should check a second time after the tank has reheated. This is also an excellent time to verify your LP gas burner is functioning properly, if you don’t normally use it to heat your water.

Should the pressure valve be tested (with heater running) periodically to make sure that it still works and has not become corroded shut or plugged?
Good question, the P&T valve doesn’t need to be exercised normally. The valve is made of corrosion resistant material and very reliable. The valve may weep some hot water from time to time while heating as the water expands a bit and can over-pressure the tank. If it seems to be leaking excessively there could be some of the sediment material caught inside the valve causing it to leak. A quick flip up on the valve will normally clear that material. Because the valve is located at the top of the tank this shouldn’t happen very often. Regular draining and cleaning the tank will help prevent this weeping. Normally, an air bubble exists at the top of the tank. This bubble acts as an expansion cushion. The air bubble shrinks over time and the tank can start to over-pressure when heating. When the tank is drained and refilled the bubble is replenished.
Thanks so much for this info! I purchased my rig used and since it was sold on consignment the dealership didn’t really explain much on care of systems. This post has answered my questions and concerns with regards to my hot water heater! I’m checking it out tomorrow!! Thanks again!!