One of the biggest fears that all RV owners have is water making its way into areas of the unit where is shouldn’t be. We did a lot of research on things to watch for and this was top of the list. Being in Arizona, we didn’t have many opportunities to watch for leaks: until monsoon season starts, when the rain comes fast and hard. When the first rains hit, rain water was dripping from the middle of the living/dining room slide.
We set up the pots and pans to catch the water and started looking for the cause.
It became clear pretty quick that the roof of this slide was sloping in all the wrong ways. Because there was no center support, the slide roof sagged toward the inside and middle. This allowed the rain water to puddle up and eventually overwhelm the multiple layers of seal protection. As a temporary measure we used the leveling system to tilt the house to one side and back, this allowed the water to drain away from the seals but having the unit so unleveled was awkward to move around and not safe for the refrigerators. Containing the water making its way in and tipping the unit was a short term band aid, we needed something permanent. After that night, when the weather man predicted rain we would plan ahead and clean off the slide roof and roll in the leaky slide.
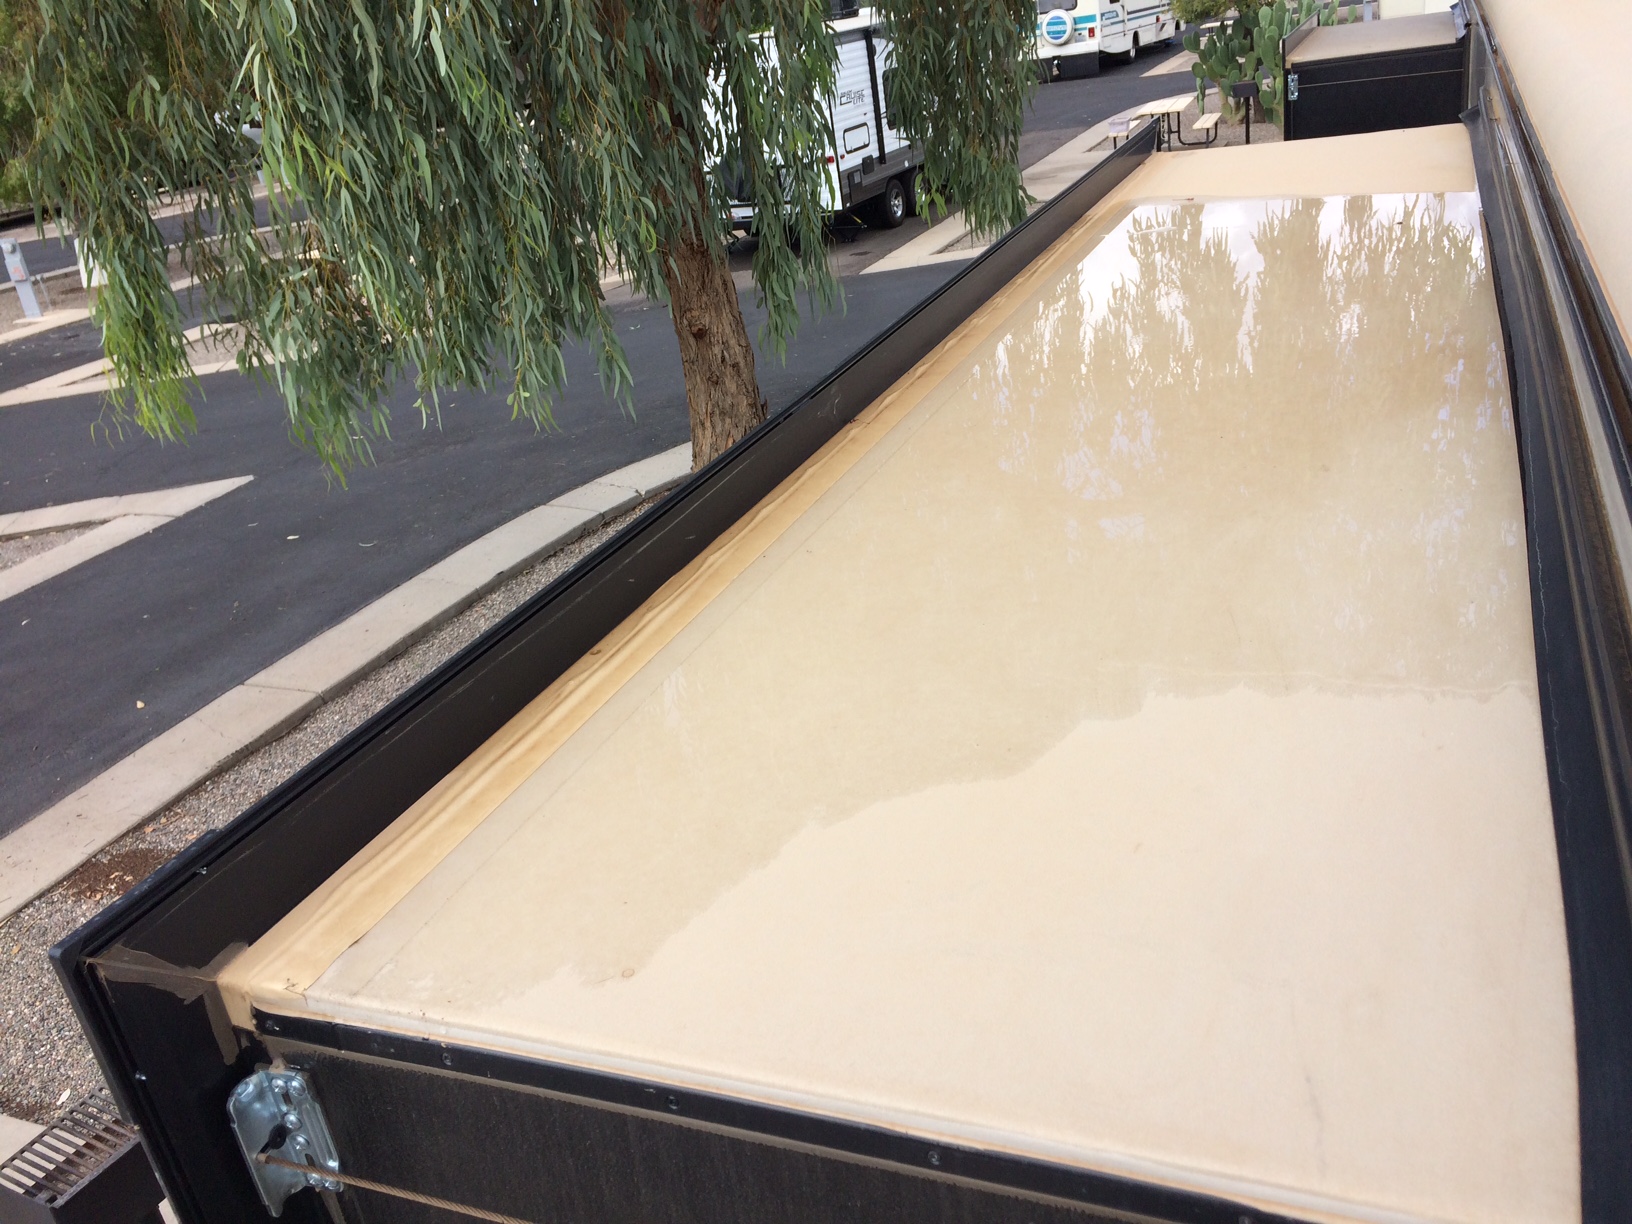

Between rainstorms we climbed upstairs and confirmed the problem. There was a large puddle in the middle of the slide roof. The standing water against the two main rubber wiper seals made its way under the seals and, once it was deep enough, it dripped over the inside edge. We weighed several plans that included building an internal support for the roof, adjusting the slide system to allow more tilt in the slide, and installing a slide topper awning. The slide awning rose to the top of the list as the least invasive to the interior and within our skill level to install. We found a 13.5 foot Lippert Solera awning unit we liked on Amazon, the price was reasonable and shipping was free!
Our Shopping List
– Lippert RV Solera Awning
– Dicor butyl tape
– Dicor 501LSW self leveling sealant (we didn’t need this but had it on hand, just in case)
– silicone lubricant spray
– Ladder
– A second ladder, rented from the local Lowes
– Lots of sunblock!
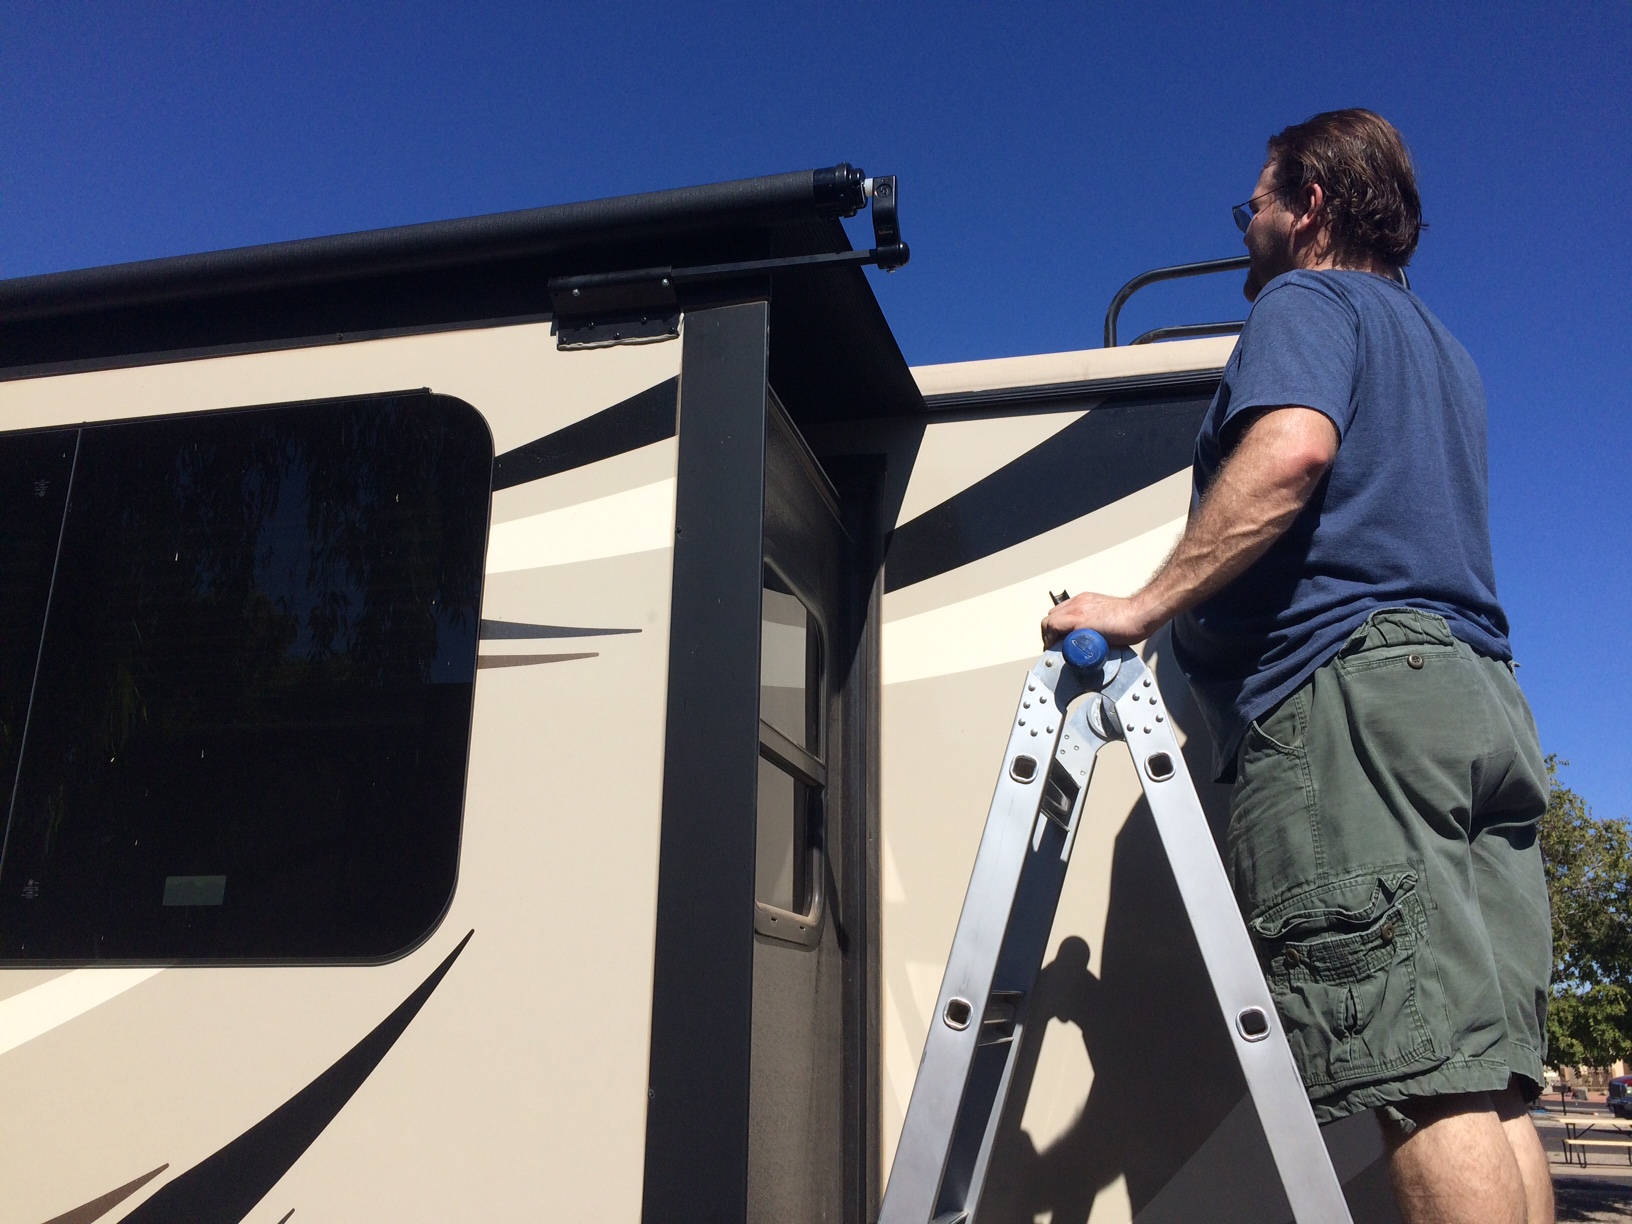
Once everything arrived, we set up our ladders and dove in. The Solera awning package came with all of the hardware we would need to install the unit. It included several packages of screws, the awning assembly, hex support bars, mounting brackets, and the awning attachment bracket that connects the end of the awning to the side of the unit. It turned out we didn’t need the awning attachment bracket, the gutter on our trailer had an integrated channel for attaching awnings. The instructions called for us to retract the slide to a maximum of 6 inches out. The hex tube mounting brackets are designed to fit into the corners of the slide face and screw into the frame of the unit. A couple strips of the Butyl tape installed on the back of the bracket would seal the holes as the screws were installed. The excess butyl sealer that squirted out from behind the brackets was removed. Next we sprayed the mounting channel with the silicone lubricant to help the awning end slide through easier. With each of us on an end of this 13 foot awning, easier was important.
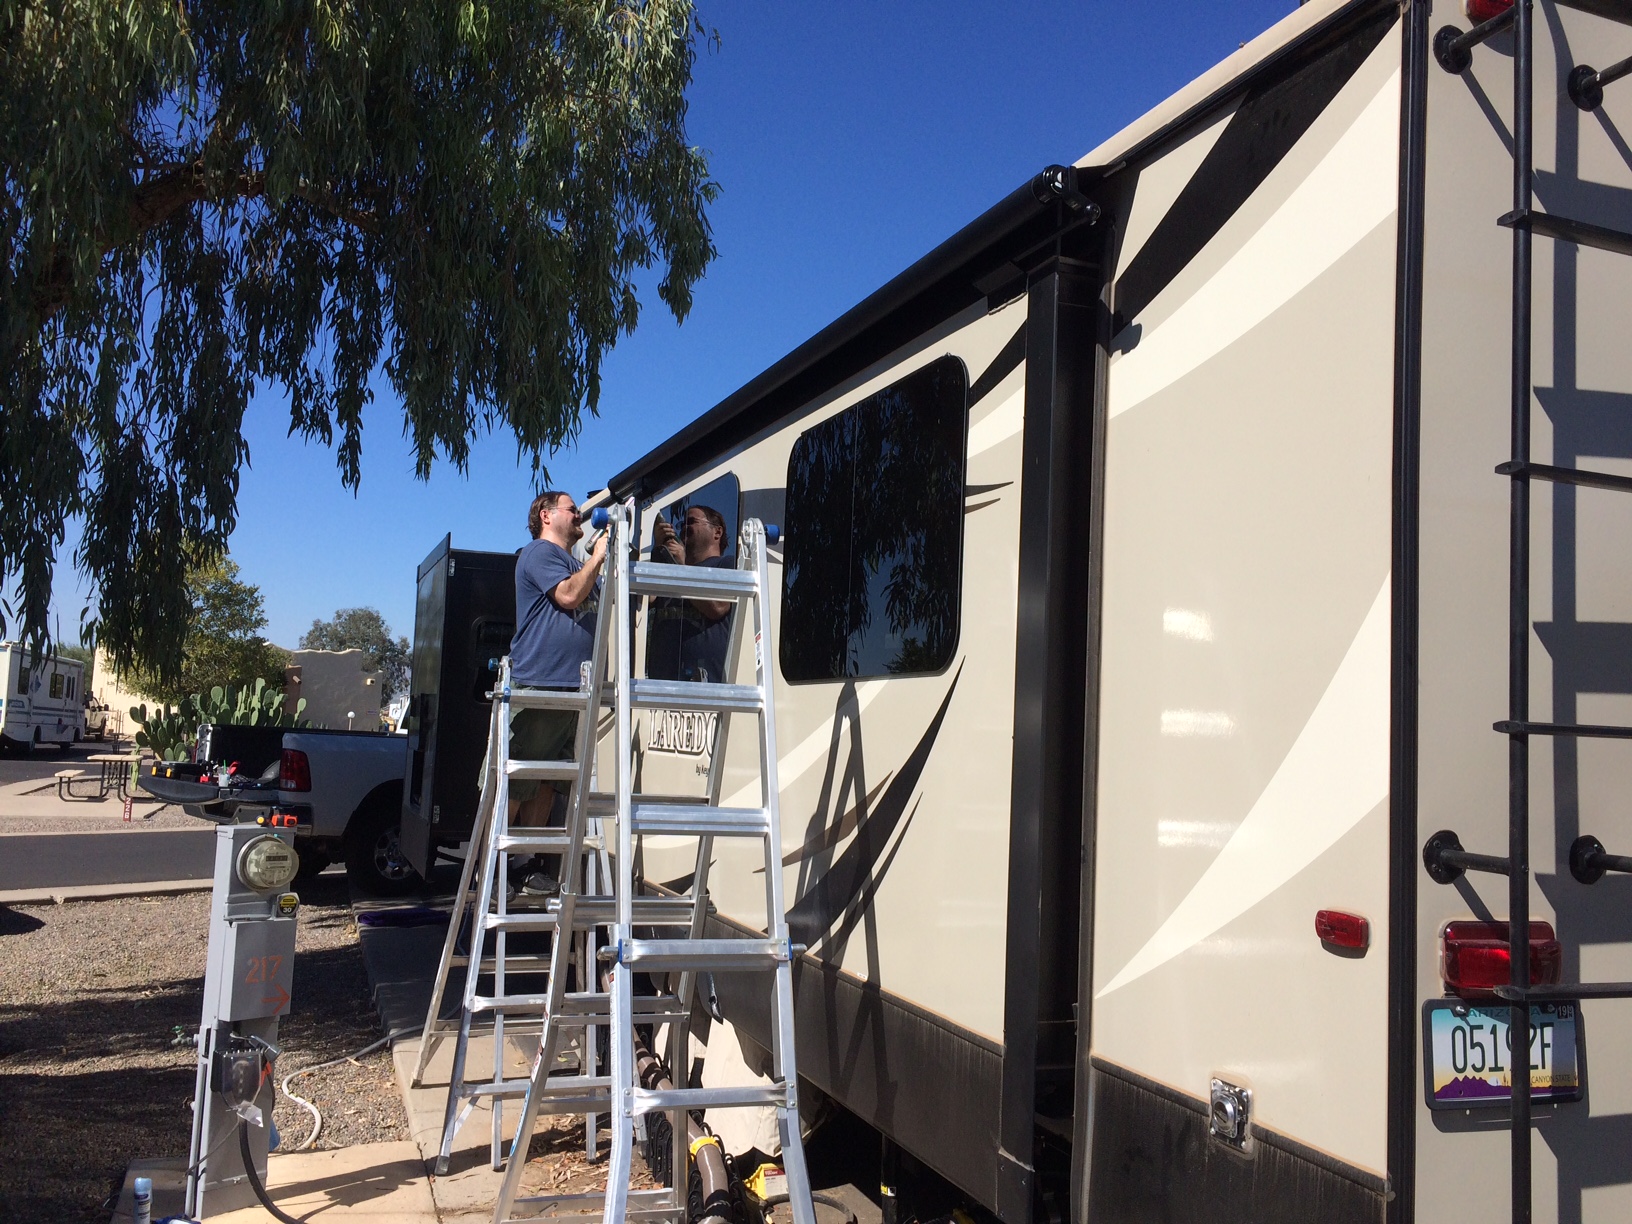
Jen took the lead end and guided the awning end through the channel. The awning bracket was able to carefully slide across the top of the slide frame trim as I pushed it from the far end. Due to the length, we both had to reposition our ladders a couple times but all in all the main install went pretty smooth. The hex rods attach to the awning assembly and insert into the mounting brackets. Once things were centered the hex rods were locked into place with self-tapping screws. Two more screws were driven into the ends of the awnings where it attached to the wall, these kept it from sliding around in the channel. The last thing we had to do was remove the keeper pins that hold the spring tension for the awning roller. Once the awning roller was freed we ran the slide in and out several times to verify that everything was working.

We had to wait a bit before the weather man sent us our first real test, but in that time we did notice an unexpected bonus: mid-October in Phoenix is still pretty hot outside, and the RV was staying cooler than usual. Our new slide awning was preventing the Arizona sun from beating down directly onto the slide roof. When the next rain storm hit, we stayed dry and there was no evidence of water building up at all on our slide roof.


Gluten-Free RV is a participant in the Amazon Services LLC Associates Program, and some links in this post are affiliate links. This means that there will be no additional cost to you if you shop at Amazon.com using these links, but we will receive a small percentage of those purchases as a commission. Your purchases are confidential: we will never know what you buy or if you buy anything.